openFrameworks on EC2
May 17 2013
For quite some time I’ve been trying to get an openFrameworks app running on a non-GPU server. I had been thinking that it would be necessary to get something like Mesa 3D running within oF for off-screen software rendering, but it turns out that this isn’t the case.
- Stream video from an oF app via ffmpeg
##How?
If you’ve never used EC2 before, you’ll probably want to read some kind of introduction.
-
Launch an EC2 instance with Ubuntu 12.04.2 LTS (Precise Pangolin).
I recommend launching an “m1.large” instance ($0.240 per Hour/2 cores/4 ECUs), or, at the very least, an m1.medium ($0.120 per Hour/1 core/2 ECUs). Anything smaller will be SUPER slow, and even tends to run out of memory while doing the most basic oF stuff.
- Note your Public DNS address. It will look something like ec2-XX-XXX-XX-XX.compute-X.amazonaws.com. It should be listed when you click on the instance name and show details.
-
Now we need to install a bunch of stuff, so SSH into your instance
ssh -i my-keypair.pem ubuntu@ec2-XX-XXX-XX-XX.compute-X.amazonaws.com -
Since we are using Ubuntu Server, it doesn’t come with graphical desktop stuff by default, so the first thing we need to do is install it. This takes quite a while, so be patient. WTF is this “DEBIAN_FRONTEND=noninteractive” stuff?
sudo apt-get install -y build-essential export DEBIAN_FRONTEND=noninteractive sudo -E apt-get update sudo -E apt-get install -y ubuntu-desktop -
Install FreeNX server on your instance. This is supposedly better than VPN for remote desktoping.
sudo add-apt-repository ppa:freenx-team/ppa sudo apt-get update sudo apt-get install -y freenx freenx-server -
Get a FreeNX configuration file
wget https://bugs.launchpad.net/freenx-server/+bug/576359/+attachment/1378450/+files/nxsetup.tar.gz tar zxvf nxsetup.tar.gz sudo mv nxsetup /usr/lib/nx/nxsetup sudo chown root:root /usr/lib/nx/nxsetup -
I’m not exactly sure why you have to “install” FreeNX again – isn’t that what we did in step 5? Anyway, you will be asked if you wish to generate a new user key. Type “N”
sudo /usr/lib/nx/nxsetup --install sudo echo -e "\n#Use unity 2d for client sessions\nCOMMAND_START_GNOME='gnome-session --session=ubuntu-2d'" | sudo tee -a /etc/nxserver/node.conf -
By default, the EC2 server is set up to only allow public key connections, but the FreeNX connection will happen over SSH, so we need to enable SSH password authentication. But before we do that, set a password for your account.
sudo passwd ubuntu -
Enable password login
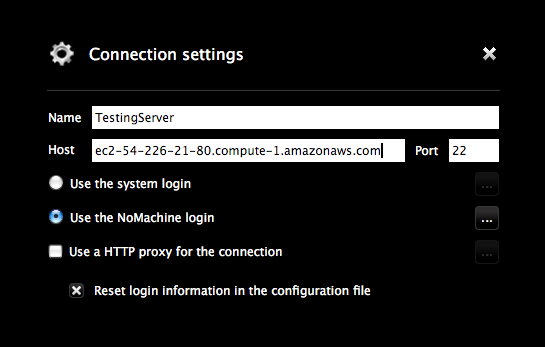
sudo nano /etc/ssh/sshd_config [Set PasswordAuthentication to "yes" where it says "no", then save and exit.] sudo /etc/init.d/ssh restart - Get the NoMachine 4 Preview. This will install both NoMachine Server and NoMachine Player. We are only interested in the Player…
- Launch NoMachine Player and connect to your server. Hint: Make sure “Use NoMachine Login” is selected
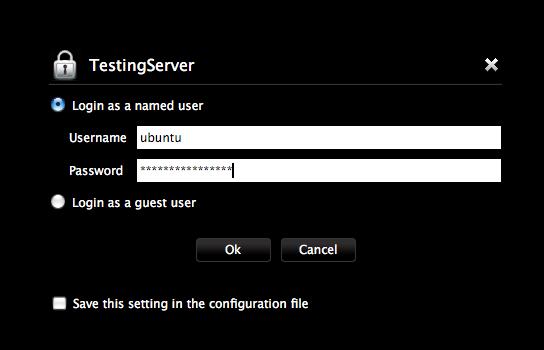
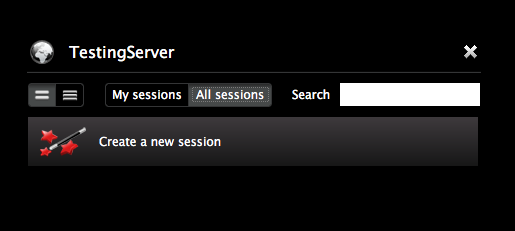
- Once you’re logged in, you can launch Firefox and head to http://www.openframeworks.cc/download/, get the code::blocks (64 bit) version of oF, and go through the install process
##Limitations
- Shaders
##Resources
- related thread on oF forum
- Installing FreeNX: I kind of use a combination of these three articles to finish the job.
- 4 easy steps to enable remote desktop on your ubuntu ec2 instance Written for 9.10 (Karmic Koala), but helpful
- Desktop Ubuntu in Amazon EC2 - The Right Way Written for 10.04 (Lucid Lynx), but helpful to crosscheck with previous
- Installing the FreeNX server on Ubuntu Karmic (9.10) and higher
- Installing FreeNX server on 12.04 Precise Pangolin “Use unity 2d for client sessions”
-
NoMachine Article: #AR04H00561
If you are connecting from NoMachine Player to NX server 3.5.0, be sure you select “Use the NoMachine login” rather than “Use the system login” in the Connect GUI and re-try to run the session.