NOTE This tutorial assumes that you have already completed the introductory lessons (especially Introduction to openFrameworks) and/or have a firm grasp on basic programming concepts, as well as some familiarity with a creative coding tool such as Processing or Flash. It also assumes that you have downloaded openFrameworks 0072 and followed the appropriate setup instructions (also linked on the download page).
Creating a Project
As of version 0072, openFrameworks ships with a projectGenerator tool that greatly simplifies the process of creating a new oF application. So let’s make our first project.
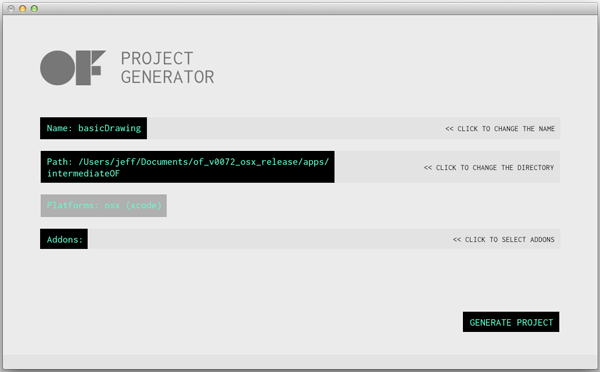
First, launch the projectGenerator (in the projectGenerator folder of your oF distribution)
Click on “Name:” and change the name to “basicDrawing”
Click on “Path:” and select path/to/your/of_v0072_osx_release/apps/intermediateOF (note: you’ll have to create the folder called “intermediateOF”)
Note about project path (from projectGenerator/readMe.md)
This defaults to apps/myApps, but it should allow you to put projects anywhere. We strongly recommend you to keep them inside this release of OF, so that if the OF release or your project get moved, or if some lower level folder gets renamed, the generated paths don’t break. it’s much safer to have paths that are “../../../” vs paths that have a name in them. please note that because we also create a folder with this tool with the name of your project, the actuall full path to your project will look like:
chosenPath/projectName/projectName.project
(where chosenPath and projectName are based on your settings, and .project is the xcode, code blocks, visual studio file that’s generated)
Click “GENERATE PROJECT” and you will see a notification at the bottom of the window that the project has been generated.
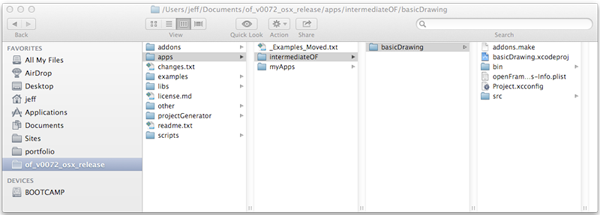
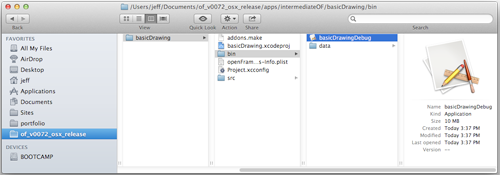
Quit out of the Project Generator and open up the folder that was generated.
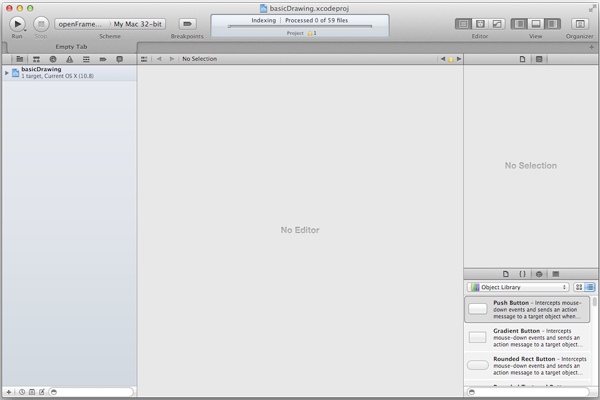
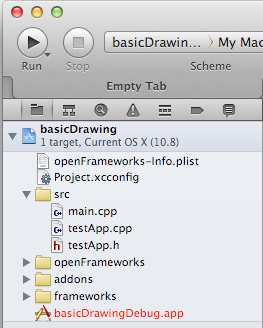
Now click on basicDrawing.xcodeproj (in CodeBlocks: basicDrawing.cpb, in VisualStudio: basicDrawing.vcxproj) This will launch XCode and open up the project that you just generated. You should see a window like this:
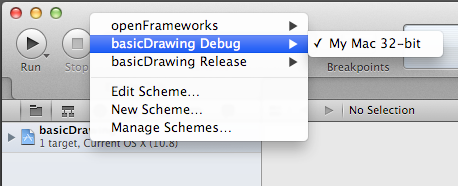
Click the dropdown menu above “Scheme” and chosen “basicDrawing Debug” instead of “openFrameworks”. For some reason, by default, XCode is set to compile the openFrameworks library, which, by itself, does nothing. Instead, we want to compile and run our basicDrawing application, which is set up to automatically compile the openFrameworks library anyway.
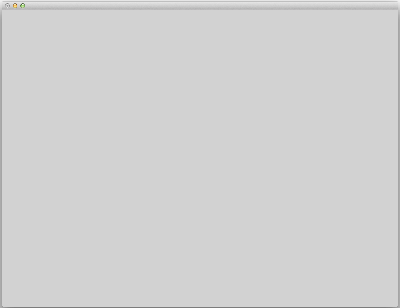
Now click the “Run” button in the upper left corner. You should see an empty grey window. Congratulations! You’ve just compiled your first openFrameworks app!
Tip: If you look in intermediateOF/basicDrawing/bin, you will see the application that you just created. This is a full-fledged native application for your platform. Try double-clicking on it.
TIP If you don’t see the grey window, check out the Troubleshooting section at the bottom.
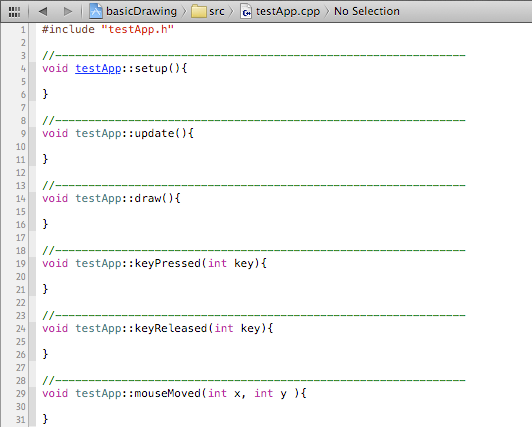
Now let’s take a look at our source files. Quit out of your awesome grey window and click the disclosure triangle to the left of the blue icon on the far left of the window, and then click the disclosure triangle next to “src”. This exposes the source files that make up your project. To open a file in the editor window, single-click it in the panel on the far left.
testApp.cpp
If you are familiar with c++, you will recognize the blocks of code in this file as empty member functions of a class called testApp. If you are familiar with any other object-oriented language, the syntax might look a bit strange, but testApp is, indeed, a regular class. For more information about c++ classes, check out the documentation at cplusplus.com.
This testApp class is what makes up your openFrameworks application. It’s where the magic happens. For our current purposes, we can say that the act of making an openFrameworks application is filling in the functions of testApp. Each function is called automatically by openFrameworks at specific points during the runtime of your application.
testApp.h
This is where the testApp class is declared. If you are accustomed to a language like Java, it might seem strange to you that the testApp class consists of 2 files, but that’s just how it is in c++. The header file is where you have to declare all of the functions that make up your class, and all of the member variables of your class. An extremely simple class would look something like this:
//Foo.hclassFoo{public:Foo();// declare the constructorintdoSomething();// declare a functionintnumber;// declare a member variable};
This is the file that kicks off the entire program. Like many programming languages, c++ has a special function called main() that is used to kick off the program. If you look into the main() function in main.cpp, you’ll see that an instance of testApp is created.
TIP Check out the examples
Now that you understand the basic anatomy of an openFrameworks project, it’s a good idea to go back and check out the examples in path/to/your/of_v0072_osx_release/examples. They serve as a fantastic overview of the functionality that openFrameworks provides, as well as a kind of cheat sheet that you can refer back to to see how a particular class, function, or technique works.
Basic Drawing and Colors
In order to quickly introduce you to the basic concepts of drawing in openFrameworks, we will deconstruct a very simple application. Use the project that you just created to follow along.
testApp.h
First, declare ofPoint circlePos; and float radius; in your testApp.h.
One of these variables is a simple float - a decimal number.
The other is a very useful oF-specific class called ofPoint. As you might guess, it represents a coordinate. It has x, y, and z attributes, and lots of useful functions for manipulating the coordinate.
TIP: ofPoint is actually an alias for another oF class, ofVec3f.
testApp.cpp
Then, copy and paste the code from the setup(), update(), and draw() methods below into your own methods in testApp.cpp.
When you run your application, it should look like this:
So let’s take a look at what all of this means. In a nutshell, behind the scenes, this is what openFrameworks does when you launch your application:
Of course, this is almost insultingly simplified, but it is helpful to consider. An instance of testApp is constructed, setup is called, and then a loop begins where update() and draw() are called continually until you quit out of the application. This loop is known as “the draw loop”, and we will get to that in a bit. But first let’s take a look at setup:
setup()
As stated above, setup() is run automatically, immediately before the window opens. It is typically used to set global properties of our application and to initialize variables. And that’s exactly what we are doing here. As you can see, on lines 4-7, we set the framerate, window size, background color, and circle resolution†. Although it’s not shown here, you can also set the application as fullscreen and set the window title.
Since setup() is called before anything else in our application, we can use it to initialize variables and we can be confident that they will be set before they are used for any drawing.
† By default, when you tell openFrameworks to draw a circle, it actually draws a icosagon! To remedy this problem, we can tell our application that, when we draw a “circle”, we want to draw something more like a hectogon (100 sided shape).
the draw loop
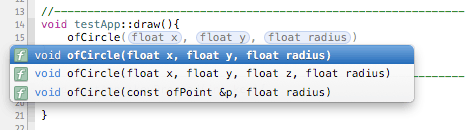
As you can see, in the draw() function, there are only 2 lines: in the first, we use ofSetColor() to set the draw color to magenta-ish. This means that anything that we draw after that (or until we call ofSetColor again) will use this color. Second, we call ofCircle(), which (shockingly) draws a circle in our window. It takes 3 arguments: x, y, and radius. In almost all of openFrameworksLand, the origin is in the upper left and the units are pixels, so (50, 300) means 50 pixels from the left side of the window and 300 pixels from the top.
TIP If you type ofCircle and wait a second, your IDE should bring up several variations on the ofCircle call. We are using the simplest one.
Once the draw loop starts, update and draw are called (in that order) continually, for the lifetime of your application. If you have used Processing before, this is a familiar concept†. If not, take a moment to think about South Park.
† Unlike Processing, openFrameworks encourages you to separate your draw loop into CPU-functions and GPU-functions. That is, all of your number-crunching and math-heavy stuff should go in the update loop, while your draw loop should only contain drawing functions. This is mainly for performance reasons, although I find that it encourages a more readable kind of code also.
Painter’s Algorithm
Try pasting this code into your draw function right below the existing call to ofCircle
ofSetColor(0,0,0);ofCircle(50,300,50);
Now remove it and paste it at the very top of the draw loop, before any other function calls. Notice that, in the first instance, the purple circle appears on top od the black one, while in the second case, it occludes the purple circle. This is known as Painter’s Algorithm, and simply put, it just means that things drawn last appear on top.
A word on framerate
Add the following to your draw function in order to see the current framerate. If your framerate plummets or is significantly lower than what you set it to, it is frequently an indication that you are doing something wrong, so you will frequently see people have a little printout with the framerate at the top of their screen.
Getting errors before you even write your first line of code can be super frustrating. The best way to overcome these annoying issues is to Google the error message. More then likely, someone has had this problem before you, and you will find an answer that will help. If you can’t find an answer on Google, head over to the openFrameworks forums and post your question. Response times are usually super fast.
OSX
Nothing happens when I press “run”
In the “Scheme” menu in the upper left hand side, make sure that the name of your app is selected and not “openFrameworks.
2.Build errors before I even wrote any code!
Make sure that the Base SDK for your project is set to an SDK that you actually have on your system. Look in this folder to see which SDKs you have installed:
Also make sure that “All” is selected in Build Settings. Otherwise, you might be changing settings for only your Debug or Release build. Typically you’ll want to change settings for “All” build types.